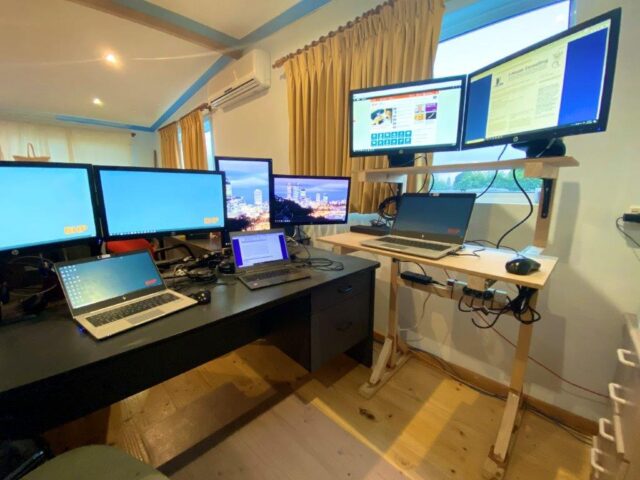
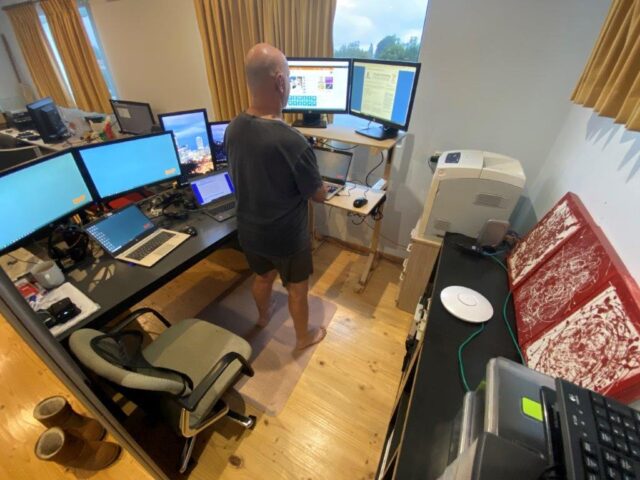
Whilst I’ve worked from home on an off for many years and have a really good office setup, the COVID-19 work from home situation prompted my wife and I to reassess our setup and make it more comfortable. We got some office partitioning to help reduce noise, especially when we’re both on the phone. Jo also purchased some noise reduction foam panels, because apparently I’m still too noisy on the phone! But most of all we were looking at standing desks. We looked at a few different models, but none really fitted all our requirements. And I didn’t want to buy something for the sake of it, and then not be happy with it. So I decided to build my own.
I treated this like any IT project. First I needed to define the requirements, which included some research on subjects like width and ergonomics. I also looked at other DIY projects on Pinterest to get some other ideas.
Requirements:
- We wanted something that was self-standing and separate to our standard desks.
- We wanted something that wasn’t too deep, would fit in a small space, and not protrude too far or get in the way of draws.
- I already had plenty of spare monitors and bases, so didn’t need to purchase monitor arms.
- We wanted two shelves:
- 1 for the laptop/keyboard
- 1 for the monitor(s)
- The top shelf should fit two monitors on stands, which for us was 800mm using 22″ monitors.
- The top shelf should also fit a laptop for webcam use when presenting, recording, or in meetings. Therefore this needed to be 350mm deep.
- The bottom shelf should slide out when it contains a laptop, so I decided to also make this 350mm deep.
- The bottom shelf must be at least 650mm wide for keyboard and mouse to fit comfortably, but I made it 800mm to match the top shelf.
- The bottom shelf sits just below elbow height at about 940mm, which is comfortable for both of us when using different keyboards and laptops.
- The top shelf sits 300mm above the bottom shelf:
- That leaves more than enough space for the laptop screen to be open and also visible when the shelf is pulled out.
- It also ensures that the monitor height can be adjusted so that your eye level is in the top third of the screens for correct ergonomic viewing.
- With this in mind I didn’t need to go to the expense of height adjusting mechanism, such as actuators.
- Use some good quality draw sliders for the bottom shelves.
- Make it out of MDF and pine.
- Paint it black to match our existing office desks and reduce reflection when recording.
My plan was to get most of the wood cut at Bunnings, but the machine in the tool shop was out of order. The blade on my circular saw is a little blunt, and I didn’t want to tear or burn the wood, so I ended up cutting everything by hand, including the miter joints.
I decided not to paint them straight away. We’ll use them for a while and work out what works and what doesn’t. Post COVID I will make any adjustments needed, put some trim around the shelves to tidy them up, and paint them.
I ended up making two of these for a total cost of about AU$200. Not too bad. Pretty happy with the outcome so far, and very practical 🙂 It wouldn’t be too hard to mass produce these and pretty easy to make them height adjustable.


